Set Up Jetson Nano Developer Kit B01
Recently I have been playing with Jetson Nano Developer Kit B01. Jetson Nano is a small but powerful computer which is often used in AI development such as image classigfication, object detection, or so on. It is producted by NVIDIA.
NVIDIA developer website now provides some cources where you can learn how to use Jetson Nano. Now I'm following this lectures but I had some troubles preparing devices, so I will make a note of how to prepare the devices and basic environment.
# What is JETSON AI COURSES?
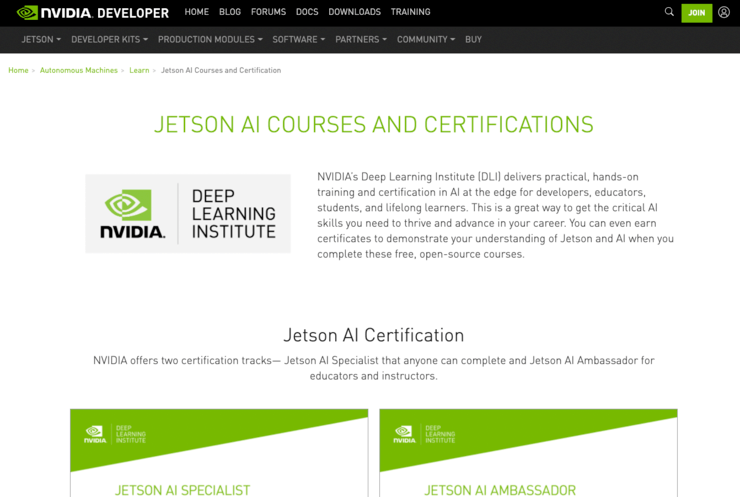
JETSON AI COURSES AND CERTIFICATIONS (opens new window)
On the above page You can find overall outlines of the JETSON AI COURSES, which is an online lecture about AI offered by NVIDIA, and you can watch instruction videos on the website and try them by yourself.
# Preparation for Device
# Assembling a Case for Jetson Nano Itself
Jetson Nano can be put on the box which is packed when delivered, but I prepared another case because circuit board is naked with just the box so it might be more sensitive to dust or something and anyway I felt a cooling fan is necessary.
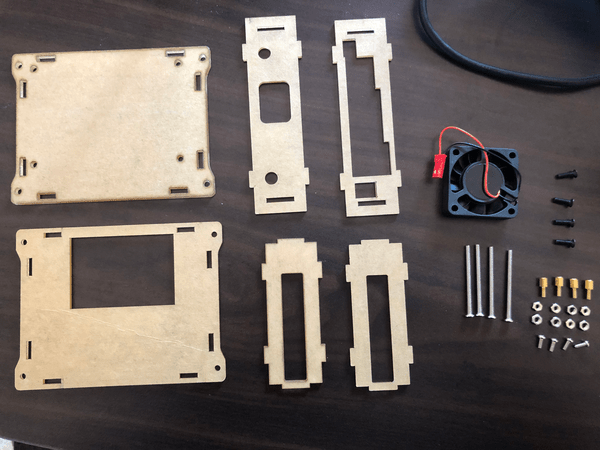
I bought the follwoing case but maybe it is purchasable only in Japan.
Assembling was not so difficult, but I was a little confused because there was no instruction paper.
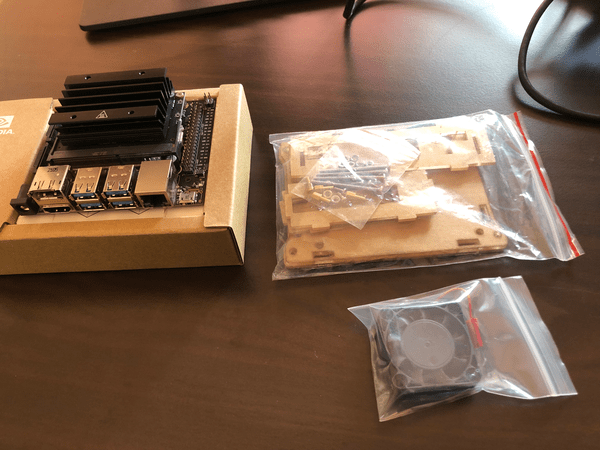
Opening the bag, there were the following parts:
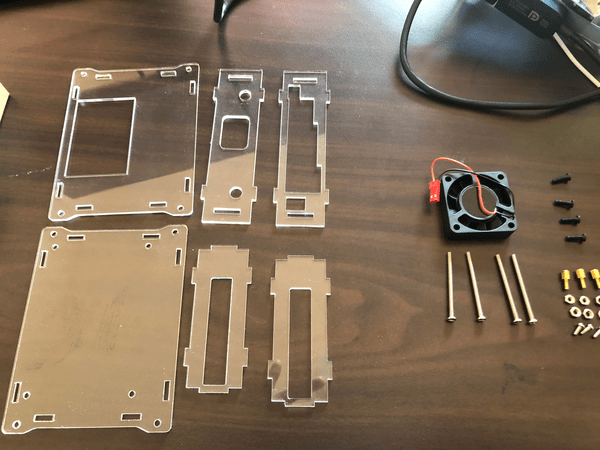
Removing the protective films and acrylic plates appeared like this:
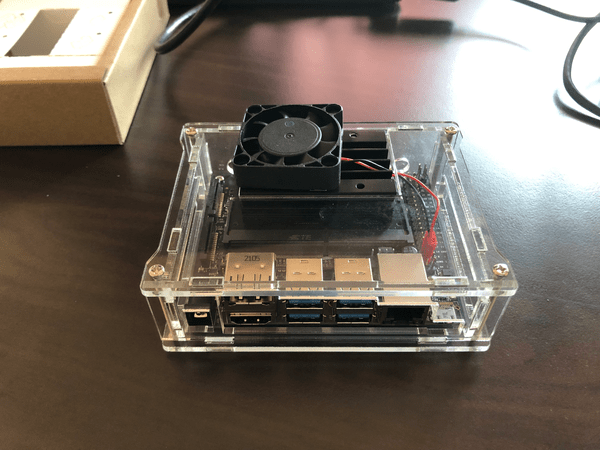
Finally finish to assemle:
Actually after finishing to assemble the entire parts, I realized I had to unscrew and dismantle the lid for setting a jamper for power supply with an AC adapter and for installing a camera module. Maybe it depends on your case, but in my case, now the lid is not screwed and the left board is removed because I might remove the camera module after finishing the whole lessons on Jetson AI Specialist course.
# Setting Up External Devices
The following devices are necessary:
- Mouse (Only initial setting)
- Keyboard (Only initial setting)
- Monitor (Only initial setting)
- Fan (Not necessarily necessary, but I think better to set)
- Camera Module
- LAN Cable (Internet connection is required for Docker container download)
- Micro SD Card
- Cable (micro USB port on Jetson Nano. Used for connecting to your PC. )
A mouse, a keyboard, and a monitor are necessary for initial configuration. After that, you can connect the Jetson Nano through SSH, but in my case, I keep these devices connected.
A camera Module is not necessary if you don't use, but you need it if you take instructions on the Jetson AI Specialist course.
Finally I connected the above things:
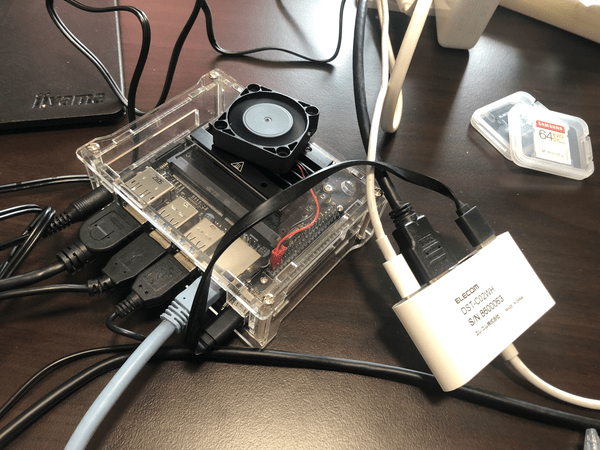
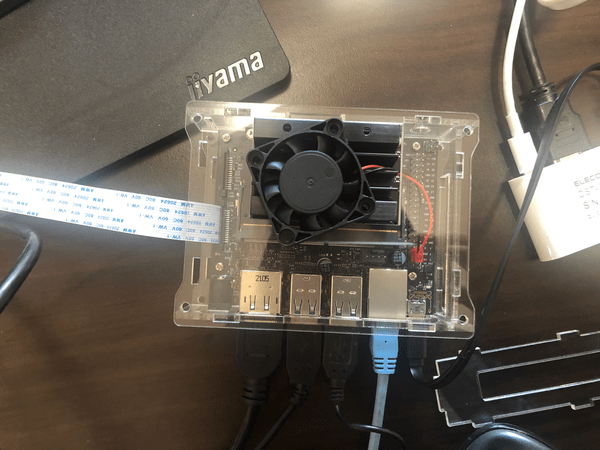
- (White band on the left) Camera Module (Only second photo)
- (Front, left to right) AC Adapter (Only first photo)
- Keyboard
- Mouse
- LAN Cable
- USB Cable (connected to the laptop Mac PC)
- (Inside Red cord on the right) Fan
- (You can't see in the photos) micro SD slot on the rear side
*Jetson Nano will automatically start running when plugging an AC adapter, so before that, you need to insert micro SD with an OS image data.
Maybe you can't find in the photo, you need to set a jamper for power supply with an AC adapter. In my case, a jamper is also packed and I didn't need to prepare it (rather I prepered one in vain), but in some cases there is no jamper.
A white device on the right side is just for external connection from a Mac OS and not related with Jetson Nano itself.
By the way, I usually use a Mac Book Air PC but it has no SD card slot, so I had to prepare a SD Card reader/writer.
# Start Running Jetson Nano
After preparing the device, let's start running the Jetson Nano.
The overall flow is as following:
- Flash image data to micro SD card (At this point, Jetson Nano is not necessary yet)
- Set the micro SD card to the Jetson Nano, start runinng, and make initial configuration.
- Increase swap space
- Download and start Docker container
Note that the following conditions are necessary for starting Docker container.
- A camera module should already be connected.
- Jetson Nano itself should be connected to the Internet.
Basically what you should do is just to connect a camera module and a LAN cable.
# Flash Image Data to Micro SD Card
First, Download JetPack data from JETPACK SDK (opens new window) page in Jetson Nano developer Kit by NVIDIA (opens new window).
Now when I am writing this post, the download button is the left button in the following capture.
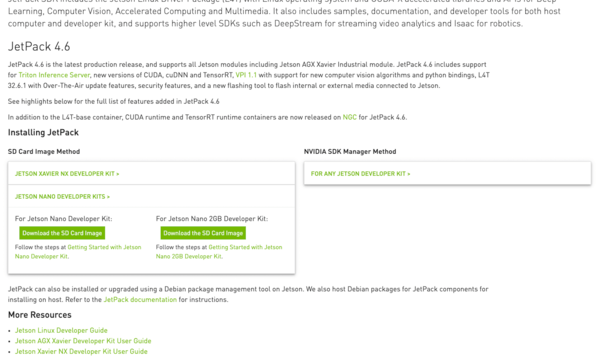
As it is also mentioned on an instruction video, it may take more than tens of minutes to download the file because the size is about 6 GB, which is quite heavy.
Then format your micro SD card and flash the image data. On the instruction video, the instructor uses an application named Etcher, but actually you can flash data just by some commands if you use Mac OS. For reference, I'll note my own operation.
WARNING
if you take a wrong operation it might break your data unexpectedly, so if you don't understand well it may be safe to use Etcher.
# Check the corresponding disk
$ diskutil list external | fgrep '/dev/disk'
$ df

# In my case, the disk was /dev/disk4
# but it depends on your environment
# Be careful, because if you take a wrong number, it may cause removing other data.
$ sudo diskutil partitionDisk /dev/disk4 1 GPT "Free Space" "%noformat%" 100%
$ /usr/bin/unzip -p ~/Downloads/jetson-nano-jp46-sd-card-image.zip | sudo /bin/dd of=/dev/rdisk4 bs=1m
2
3
4
5
6
7
8
9
Anyway the image data is quite huge and it takes a lot of time.
# Set Micro SD, Start Runinng Jetson Nano
Insert the micro SD card into the rear slot on the Jetson Nano, set the AC adapter and supply power, ant then Jetson Nano will automatically start running.
Jetson Nano has no power button, so what you have to do for booting Jetson Nano is just to supply power, but if you use an AC adapter, you have to set a jamper to the circuit board. At the first time, I didn't notice this and I had to unscrew and remove the lid 😦
After booting Jetson Nano, what you should do at first is to accept some policies, select languages, and some other configurations. You can configure this just to follow the instructions.
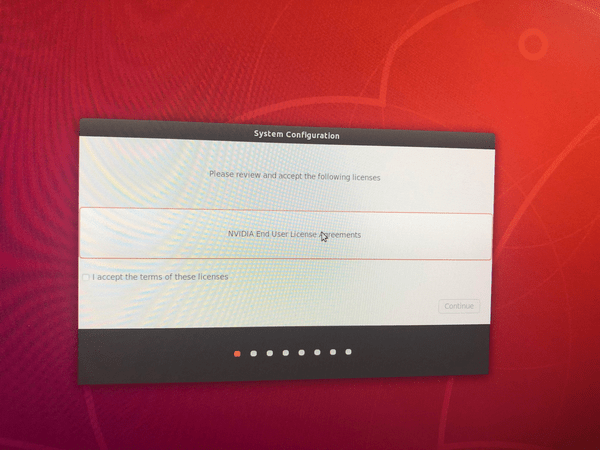
I set language to English(US), location to Tokyo(Japan).
After that, you have to input user account information. On the insturction video, the instructor set it "nvidio" but actually anything is ok if it is valid as an linux account name.
Finish the initial configuration!
Nice desktop design 😃
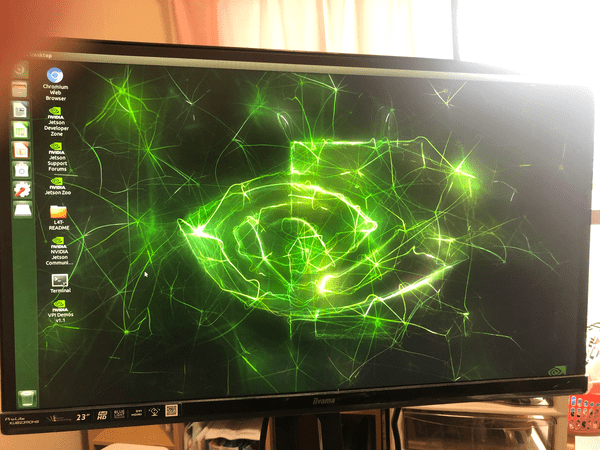
Then you see a shortcut icon for an terminal application on the left side of the screen, dblclick this to start the terminal.
It seems a usual Ubuntu OS.
$ ls -al
total 108
drwxr-xr-x 17 kaz  kaz  4096  7月 22 04:39 .
drwxr-xr-x  3 root root 4096  7月 22 04:01 ..
-rw-------  1 kaz  kaz   175  7月 22 04:11 .bash_history
-rw-r--r--  1 kaz  kaz   220  7月 22 04:01 .bash_logout
-rw-r--r--  1 kaz  kaz  3771  7月 22 04:01 .bashrc
drwx------ 10 kaz  kaz  4096  7月 22 04:29 .cache
drwx------ 14 kaz  kaz  4096  7月 22 04:04 .config
drwxr-xr-x  2 kaz  kaz  4096  7月 22 04:02 Desktop
drwxr-xr-x  2 kaz  kaz  4096  7月 22 04:02 Documents
drwxr-xr-x  2 kaz  kaz  4096  7月 22 04:02 Downloads
〜

$ pwd
/home/kaz
2
3
4
5
6
7
8
9
10
11
12
13
14
15
16
# Increase swap space
Just check memory allocation and make a swap file of 4GB.
# Check Swap Space
$ free -m

# Make Swap
$ sudo systemctl disable nvzramconfig
$ sudo fallocate -l 4G /mnt/4GB.swap
$ sudo chmod 600 /mnt/4GB.swap
$ sudo mkswap /mnt/4GB.swap
$ sudo su
$ echo '/mnt/4BG.swap swap swap defaults 0 0' >> /etc/fstab

# Reboot and rechck swap space
$ reboot
$ free -m
2
3
4
5
6
7
8
9
10
11
12
13
14
# SSH from PC
Then I found I had to register Getting Started with AI on Jetson Nano course on NVIDIA developer site.
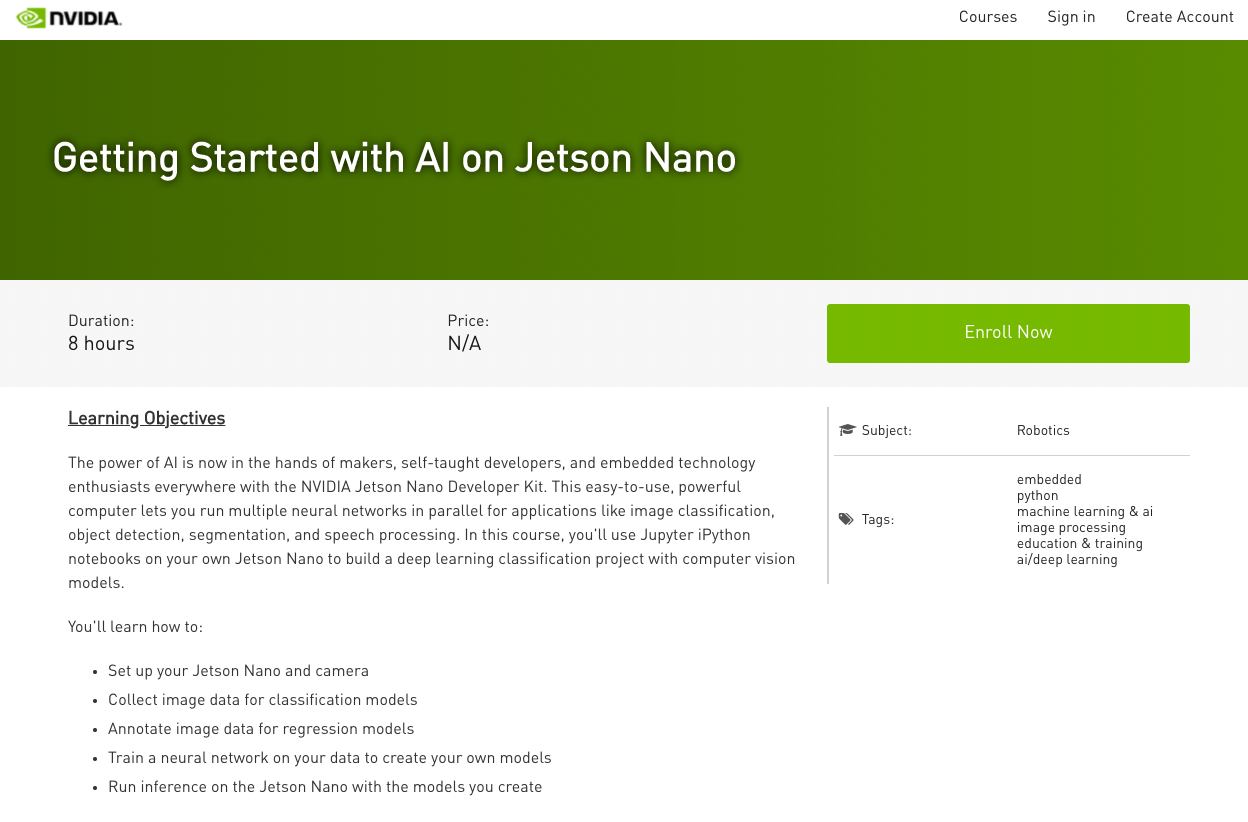
Getting Started with AI on Jetson Nano (opens new window)
After registration, back to the above URL, then click "Course" -> "Setting up your Jetson Nano" -> "Headless Device Mode".
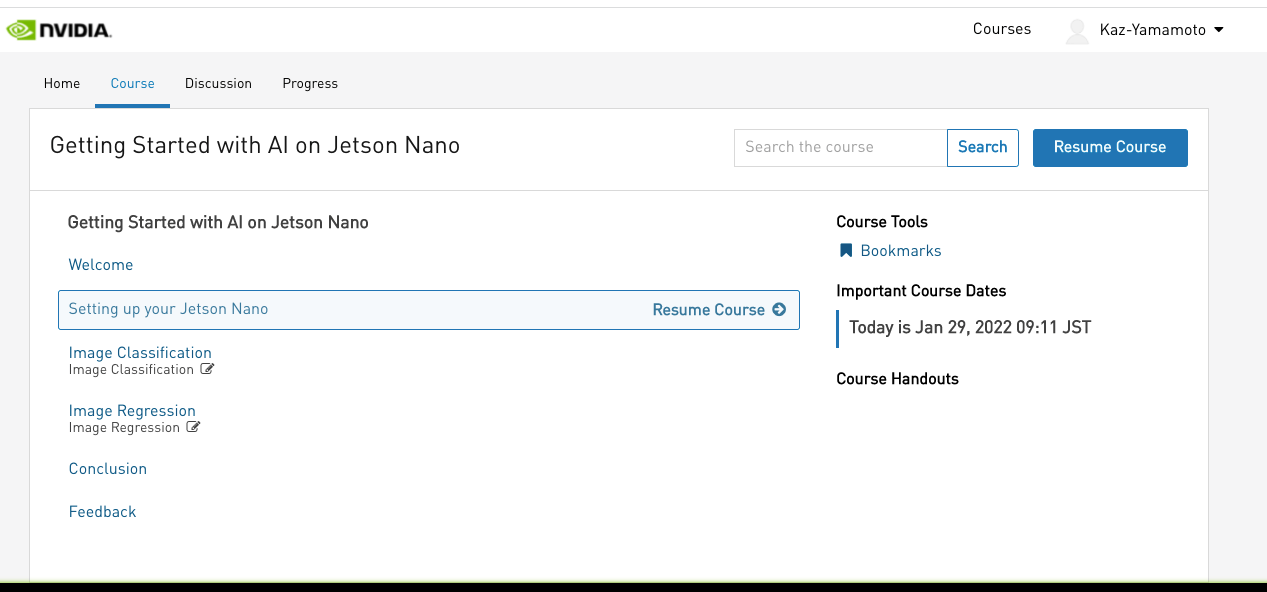
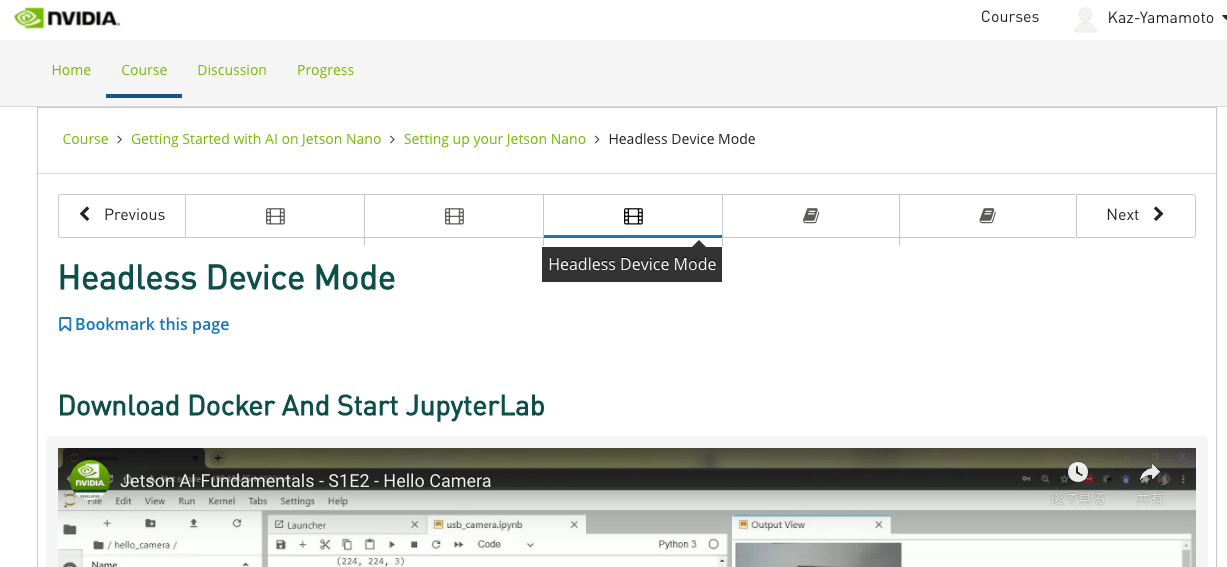
Then scrolling down, you see descriptions how to SSH to your Jetson Nano and install a Docker container.
First, SSH to the Jetson Nano from my laptop PC.
$ ssh kaz@192.168.55.1
By the way, (although it is a specification of SSH itself regardless of Jetson Nano) if you use another micro SD with another OS image data, SSH destination ip address will be the same but the SSH key saved in known_hosts will be different so that it won't be able to be connected through SSH. In this case, you can fix this trouble by updating known_hosts manually.
Anyway, after connecting Jetson Nano through SSH, you can make each operations on your PC.
# Configuration of Docker Container
Then download and install a Docker container.
Basically you can configure it by following the instruction, but notice some conditions have to be met.
- A camera module should already be connected.
- Jetson Nano itself should be connected to the Internet.
If your camera module is recognized, you can find a device on the file system like /etc/video0. If your camera module device path is different, you have to fix the following commands.
$ mkdir -p ~/nvdli-data

# create a reusable script
echo "sudo docker run --runtime nvidia -it --rm --network host \
    --volume ~/nvdli-data:/nvdli-nano/data \
    --device /dev/video0 \
    nvcr.io/nvidia/dli/dli-nano-ai:v2.0.1-r32.6.1" > docker_dli_run.sh

# make the script executable
chmod +x docker_dli_run.sh

# run the script
./docker_dli_run.sh
2
3
4
5
6
7
8
9
10
11
12
13
At the first time, it takes a certain time to download a Docker image data, but after that, you can start the Docker container just by executing ./docker_dli_run.sh.